I’m so obsessed with Pizza! It’s the one food I could probably eat the rest of my life and die happy. And I’m not talking about the pizza with the low fat cheese or gluten free dough or low sodium anything. I love the very very very bad for you kind of pizza. With a buttered and garlic flavored crust, gooey cheese, and TONS of pepperoni! Pizza is so awesome it’s even good cold the next morning for breakfast, amiright?
I’ve been to Italy. I’ve had Italian pizza. I’ve been to France. I’ve tried their pizza, too. I’ve been to Bosnia and had a calzone. And I’ve had New York style pizza in New York. No joke – I’ve tried pizza from all around the world. When I was in the navy I made it my goal to try pizza everywhere we went – that’s over 25 cities outside of the continental United States. And you want to know what my favorite is? American anything. I like my crusts fluffy and buttery. I like my cheese droopy. And gawk all you want about pizza chains – it’s what I grew up with and when you don’t have it for almost a year you might really start to miss it as well. It was always the very last meal I had before a deployment and the very first one when I came home.
I may not be as obsessed about it as Miley Cyrus and if you follow her on Instagram you know what I’m talking about. But pizza has rightly so earned it’s place in my heart. It’s as classic as american burgers and american football. That’s my thought anyway.
My daughter loves it almost as much as I do. I’ve recently started making all her own lunches from fresher foods. She isn’t crazy about school lunches and neither am I. It would also get boring to eat a sandwich everyday. As I was making alist of meals I could make, hot or cold, pizza pockets came to mind. Then I went to my number one source for looking up awesome recipes – Pinterest, of course! There were almost too many choices and I had a hard time deciding. Finally, I decided on this pin from “All Recipes”. The original recipe seemed simple enough for me to put together the morning of, so I saved it.

All I needed was:
- something for the crust/pocket
- cheese
- pizza sauce
- pepperoni
So instead of following the recipe I simply used it for inspiration and did my own pocket in two different versions. I wanted to see if it would taste better made in the oven or on the stove top, so I did both. I’ll tell you how it turned out in a moment but first, here’s the recipe and directions:
Ingredients
- 1 (8 ounce) can Pillsbury® refrigerated crescent dinner rolls
- 1/4 cup pizza sauce
- 3/4 cup shredded mozzarella cheese
- 1/2 cup sliced pepperoni
- 1 teaspoon grated Parmesan cheese
Directions
- Heat oven to 375 degrees F. Unroll dough on cookie sheet and separate into 4 rectangles; press each into 6×4-inch rectangle, firmly pressing perforations to seal.
- Spread 1 tablespoon pizza sauce on half of each rectangle to within 1 inch of edge. Sprinkle each with 3 tablespoons cheese; top with 6 slices pepperoni. Fold dough diagonally over filling; firmly press edges with fork to seal. Sprinkle each triangle with 1/4 teaspoon grated cheese. With fork, prick top of each to allow steam to escape.
- Bake 13 to 15 minutes or until deep golden brown. Serve warm.
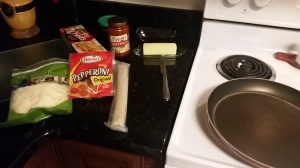
I didn’t want to use dinner rolls or make my own dough. So I opted for the only thing my grocery carried that wasn’t a dinner roll – a Pillsbury Pie Crust. Seemed logical at the time. I also picked up some Prego pizza sauce, finely shredded mozzarella cheese, and some pepperoni.
It’s a pretty fail proof recipe, so easy my 9 year old could easily do this herself. So I didn’t follow it to a “t” because I’m familiar with cooking with each of these items.
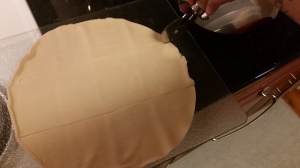
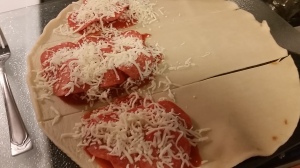
I cut my pie crust in to 3 sections
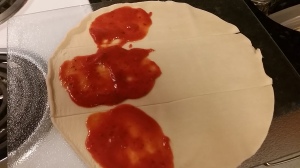
Added the sauce
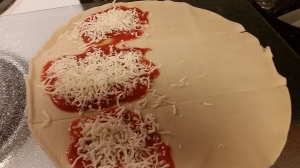
Cheese
LOTS of pepperoni
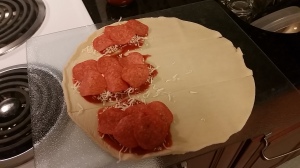
More cheese
Fold in half and pinch edges together with fork. I would press down and “drag” the fork to get the edges to pinch together best
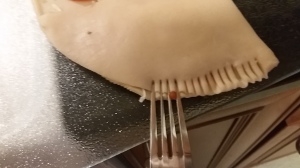
All pinched together, a little spillage was okay with me

I did one in the oven and the rest on the stove
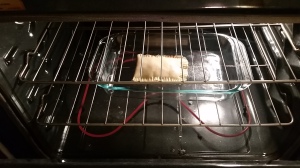
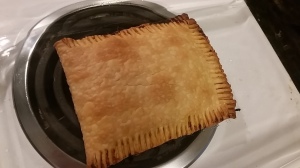
Finished Oven:
Back to the stove:
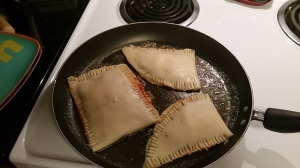
I flipped them occasionally to ensure both sides were fully cooked and golden
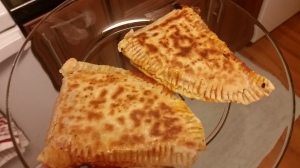
Results:
The oven version had the better crust. But using a pie crust wasn’t my best choice because it didn’t have much flavor – that was each my daughter and her friend, the husband and my opinion. BUT it was the perfect kind of flaky for a pizza pocket.
Next time I would brush the crust with butter and sprinkle with some seasoning to improve it.
But I’m glad I did this for a weekend lunch and found out how to improve it before making it for my daughters lunch then her not eating her lunch because she didn’t like it.
I will certainly be doing this more often – improving each time.
Until Next Time – XoXo,
Megan


This looks fun. We’ve made our own calzones before, but I like the idea of making smaller, individual seized pizza pockets yourself. Thanks for testing it out with pie crust for all of us. 😉
LikeLike
Oh my husband would love this, he’s a pizza addict.
LikeLike
OH YUM!!! Now I have to try this. I actually JUST posted my pizza sauce recipe today, you should check it out 🙂 http://www.usandhim.com lol
LikeLike
Did you ever do the Book It! program as a kid? Where you read books to earn Pizza Hut personal pan pizzas? That was one of my favorite parts of childhood. And I’m including birthdays and Christmases. I want to make calzones soon. I did years ago but forgot about it until now. I think I used crescent rolls for the crust.
LikeLike
My Husband loves these! I might have to make them soon!
LikeLike
This looks like a fun treat to make the next time my son has friends over. I think it may just win them all over. Thanks for sharing.
LikeLike